Showing posts with label emboidery. Show all posts
Showing posts with label emboidery. Show all posts
Monday, August 11, 2014
doily lion by the bushcrafter
Look what I've won! Jenny of the Bushcrafter had a giveaway (a looooong time ago, sorry for the delayed winner post, Jenny!) and I won this dead gorgeous plush lion made from a recycled doily. The lion is so adorable with its facial expression created by Jenny. I love him!
Be sure to check Jenny at the Bushcrafter out, because she is a true inspiration when it comes to both traditional and untraditional handicrafts!
Labels:
animals,
crafts,
decoration,
design,
emboidery,
giveaway,
Inspiration,
recycle,
sewing,
vintage
Thursday, April 4, 2013
DIY bulletin board
We desperately needed a bulletin board for our home. Especially for bills, but also for keeping material memories visible.
I thrifted a vintage cross-stitch picture with frame. A huge one, perfect for a great big bulletin board.
Classic motif.
Tape off the parts you do not want to colour.
I started out painting the picture with fabric paint, but that did not work at all. Wool was a lot more difficult to colour than I expected, so I ended up spraypainting the whole thing.
More protection for the frame since I wanted to keep the original colours. Newspaper pages comes so very much in handy for all kinds of crafty work!
I wanted a gold bulletin board, but I was not sarisfied with the shade of gold on the wool embroidery, it was more of a dirty brownish shade than the pretty solid gold that stuck to the paper. So I took out my black spray paint.
I am happy with the result!
Have you made a bulletin board out of recycled materials?
Have a great Thursday!
Labels:
colour,
crafts,
cross stitch,
decoration,
emboidery,
furniture,
home,
Inspiration,
paper,
recycle,
second hand,
thrifting,
tutorial,
vintage
Tuesday, December 18, 2012
X-MAS DIY: cushion covers
One of my home decor DIY's I am really pleased with. Very simple to make, great result!
I found the red-purple rya at Stadsmissionen in Gamla Stan. Love it! I've wanted to make cusion covers from steady wool material so the rya got to come home with me. The material for the blue cushion was thrifted at my local Myrorna.
I used:
- a thrifted rya
- one coloured cushion cover
- an embroidered strip of fabric
- wool yarn and a big needle
1. I started with the rya. Folded it, right sides facing. I did not want the fringe to be visible on the finished cusion cover, so I sewed a simple running stitch beneath the fringe, so that when I turned the project inside out the fringe stayed on the inside.
2. When the project is turned inside out ande you've got the right side facing you, you continue sewing the sides of the cushion cover. I used a blanket stitch (see video instructions here) for the sides. Start with one side. Then stuff your cover with a cushion before you stitch the other side together. And you are done!
For the second cushion cover I just sewed the embroidered fabric strips directly onto the second hand cushion cover with a running stitch. I folded the short side ends in before stitching so that they would not fringe. That is about as simple a refashion you can get!
Happy crafting!
Labels:
crafts,
decoration,
emboidery,
furniture,
home,
Inspiration,
recycle,
refashion,
second hand,
sewing,
thrifting,
tutorial,
xmas diy
Friday, August 31, 2012
hemslöjden 100 år at Liljevalchs
Me and a friend went to see the jubilee exhibition of Hemslöjden 100 years at Liljevalchs in Stockholm. Traditional crafts, lots and lots of it. Both really old unchanged techniques, but also old with a modern twist.
I decided to only post pictures of these leaves. 2000 leaves designed by professionals and amateures, individuals and groups. Really inspiring and creative work!
This is my date; Katija, my room mate from way back, when we both studied in Karis. So nice to spend time with her again. She is the one who taught me to knit and crochet with passion.
Hope the pictures inspire you!
Labels:
crafts,
crochet,
cross stitch,
decoration,
design,
emboidery,
felt,
graphics,
Inspiration,
knitting,
recycle,
refashion,
sewing
Monday, March 15, 2010
twenty frames to fill
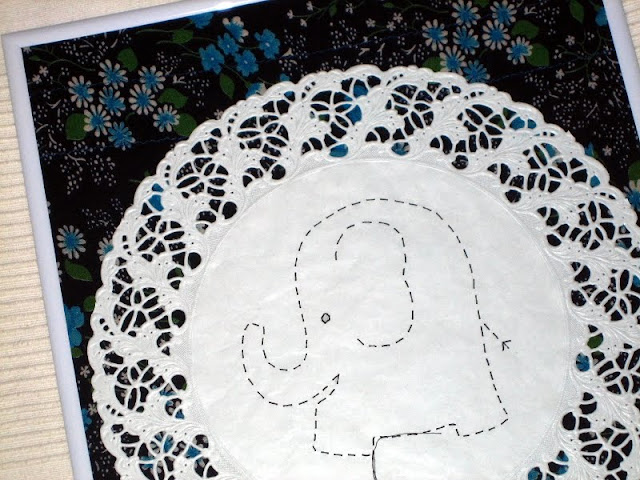
This is where my embroidered elephant on cake paper ended up, behind glass in a frame. I have over 20 frames to fill and this project is taking me a longer time to finish than I had planned, but I am proceeding well and I like what will become the result!
I have four smaller frames and I intend having every family member's name's first letter displayed in their own frame. Beautiful origami paper will decorate the back wall.
A (deliberately) blurry picture of how the frames will be organized on one part of the wall. I will have two canvas boards joining the frames, one black fabric with white numbers and one fabric that looks like an old news paper. Both fabrics thrifted. I am still working on what pictures to frame. I want family pictures and nice patterned fabric or wallpaper in calm colours.
I wish you all a good start to the new week!
Wednesday, March 3, 2010
Thursday, August 27, 2009
hand made gifts
Subscribe to:
Posts (Atom)


