


This was my contribution for Easter crafting in the latest issue of Kyrkpressen.

1. Du behöver:
- bakplåtspapper
- tygbitar
- dubbelsidig vliselin (limtyg)
- tidningspapper
- färgat papper (reklam, modetidningar, barnens teckningar)
- symaskin (eller nål och tråd)
- ståltråd
- lim

3. Here you can download the templates for the hen and the feather (click on the template you'd like to print).


3. & 4. Rita av på pappret eller tyget. Det är inte så noga med att du ritar exakt som modellen. Klipp sedan längs den ritade linjen. Vik tyget eller pappret några gånger så får du fler figurer på en gång.

5. Om du gör tygdekorationen så klipper du först ut två tygbitar, lägger dem avig sida mot avig sida med en lika stor bit dubbelsidig vliselin mellan. Stryk för att få vliselinet att fastna.
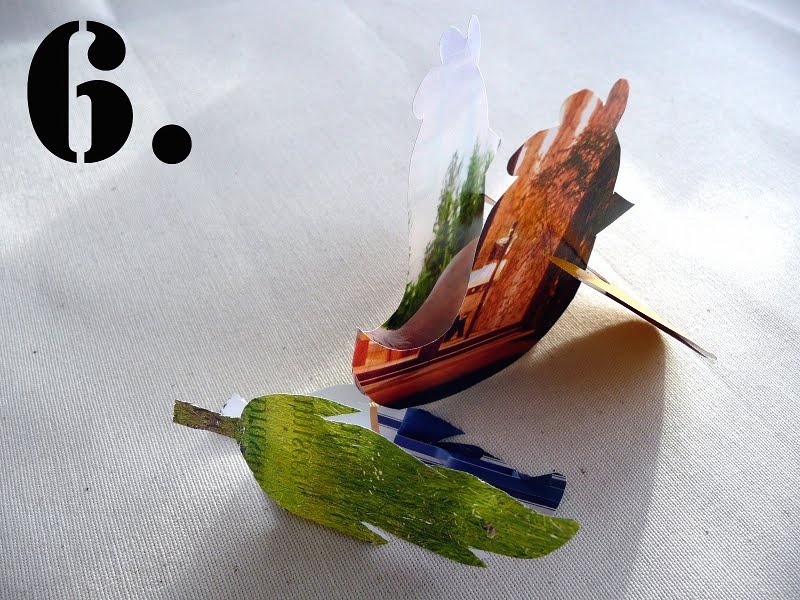
6. Om du gör pappersdekorationen klipper du figuren i dubbelvikt papper så att t.ex svansfjädrarna på hönan ligger mot den vikta kanten. Då figurerna sitter ihop på ett ställe blir det lättare att limma ihop dem rätt.

7. Pensla lim på insidan av figuren, låt ståltråden löpa rakt genom figuren och limma ihop.
7. Paint the inside of the figure with glue, place the steel wire across the figure and glue the paper figures together.

8. Nu är dekorationen klar. Låt den stå i vasen med tulpaner eller ris, eller låt den stå i påskgräset.
8. Now the decoration is done. Place it in a vase with tulips or twigs, or place it in the Easter grass.

9. En mer stilren och en dekoration i svalare i färgerna får du av tidningspapper.
9. If you cut the figures out of news paper pages you get a more clean cut style in cooler colours.

10. Liksom med dekorationen i tyg kan du sy den i papper på symaskin. (Om du syr i papper ska du ta en gammal nål eller byta till en ny nål då du igen ska sy i tyg!) Börja att sy i en figur, då den tar slut fortsätter du att "sy luft". När du sytt luft ca 5 cm matar du in nästa figur. På så sätt sitter figurerna ihop och du behöver bara köra framåt, inget backande och fästande. Du kan förstås även sy för hand med nål och tråd (se bilder nedanför)!
Häng den färdiga dekorationen i påskriset eller i fönstret.
10. As with the fabric decorations you can sew the paper decoration on a sewing machine. (If you sew paper be sure to use an old needle or change the needle to a new one before sewing fabric again!). Start sewwing one figure and when that ends you "sew air" for a aprox 5 cm. Then you feed another figure to be sewn. That way all your figures will keep together and you need only to "drive ahead", no reverse sewing and no fastening. You can of course sew the figures by hand (look at picture below) with needle and thread.
Now you hand the decoration onto twigs or in your window.
Now you hand the decoration onto twigs or in your window.

Here are the decorations I made:

out of new paper pages,

out of fabric scraps,

and coloured paper from a fashion magazine.


1 comment:
How lovely! Thanks for posting a "how to"!
Post a Comment